
Using Raspberry Pi as an Arduino (AVR) programmer
I bought a cheap Arduino nano clone from eBay and after I plugging it in via USB, I was getting only errors when trying to upload some code. I realized it came without the bootloader installed. And I didn't have a normal AVR ISP programmer to program the flash memory on the microcontroller.
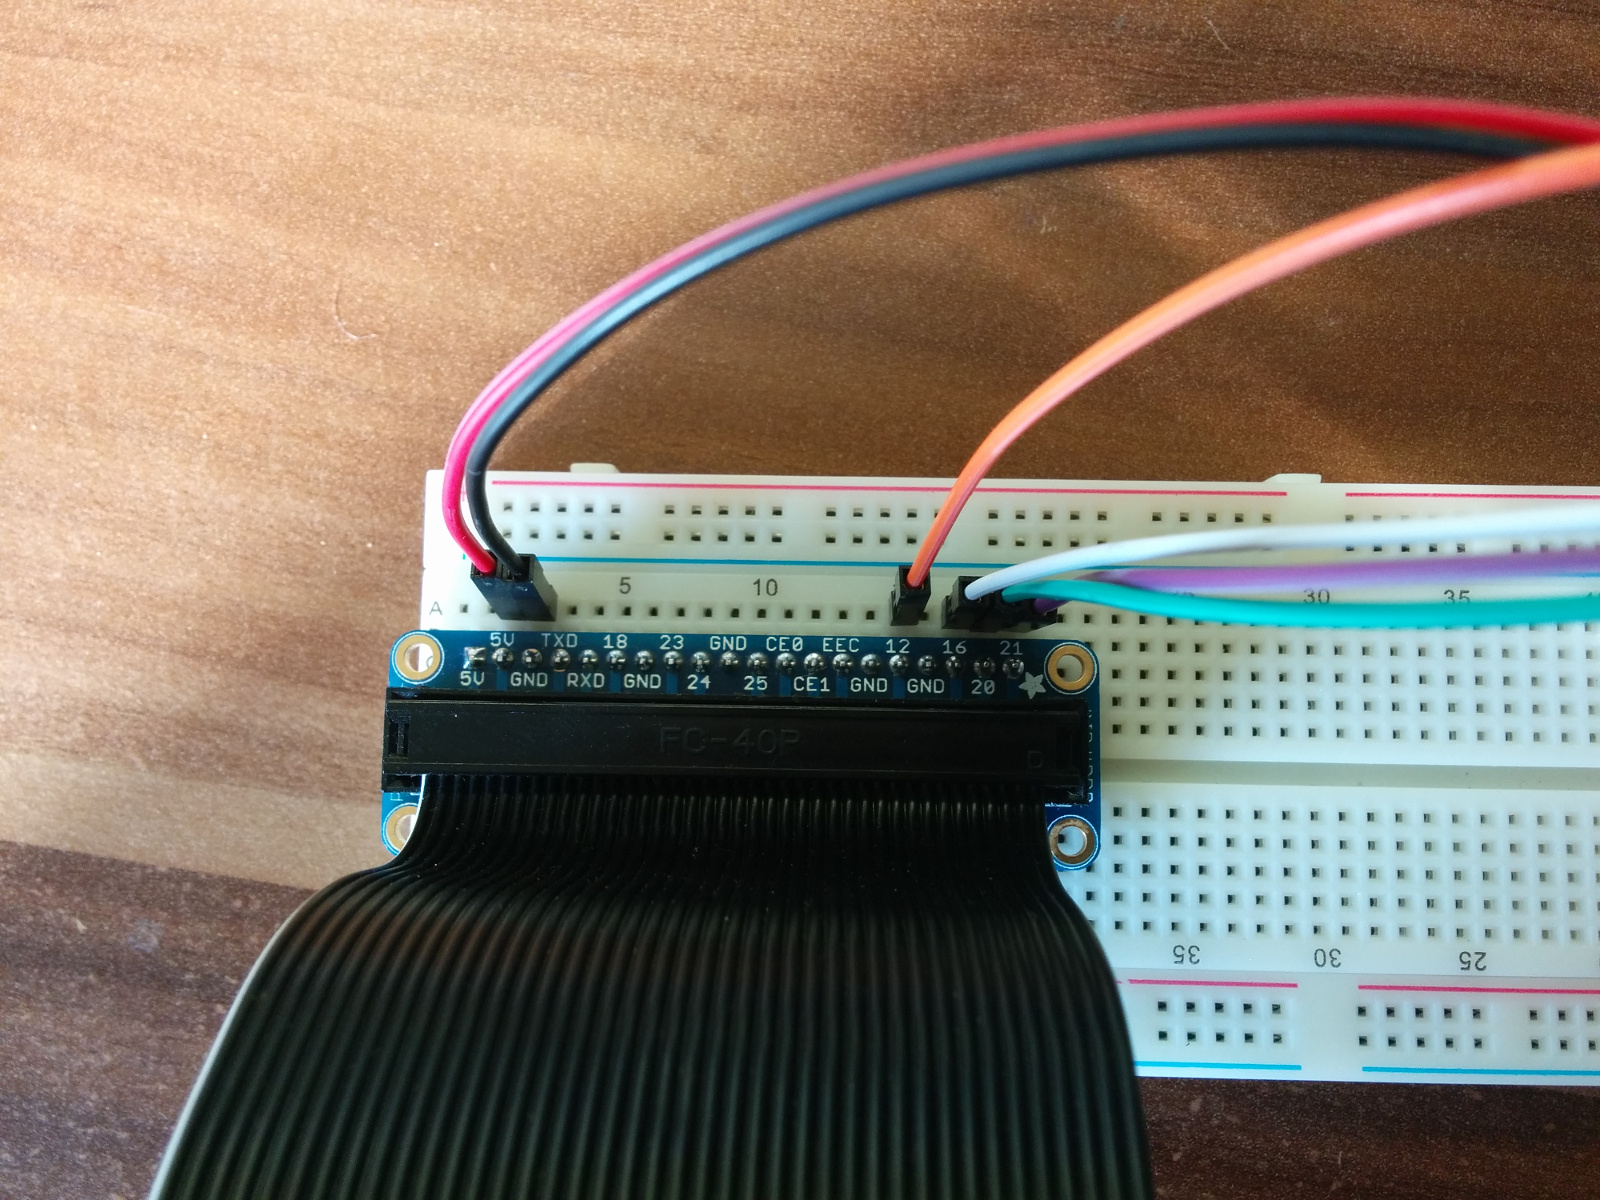
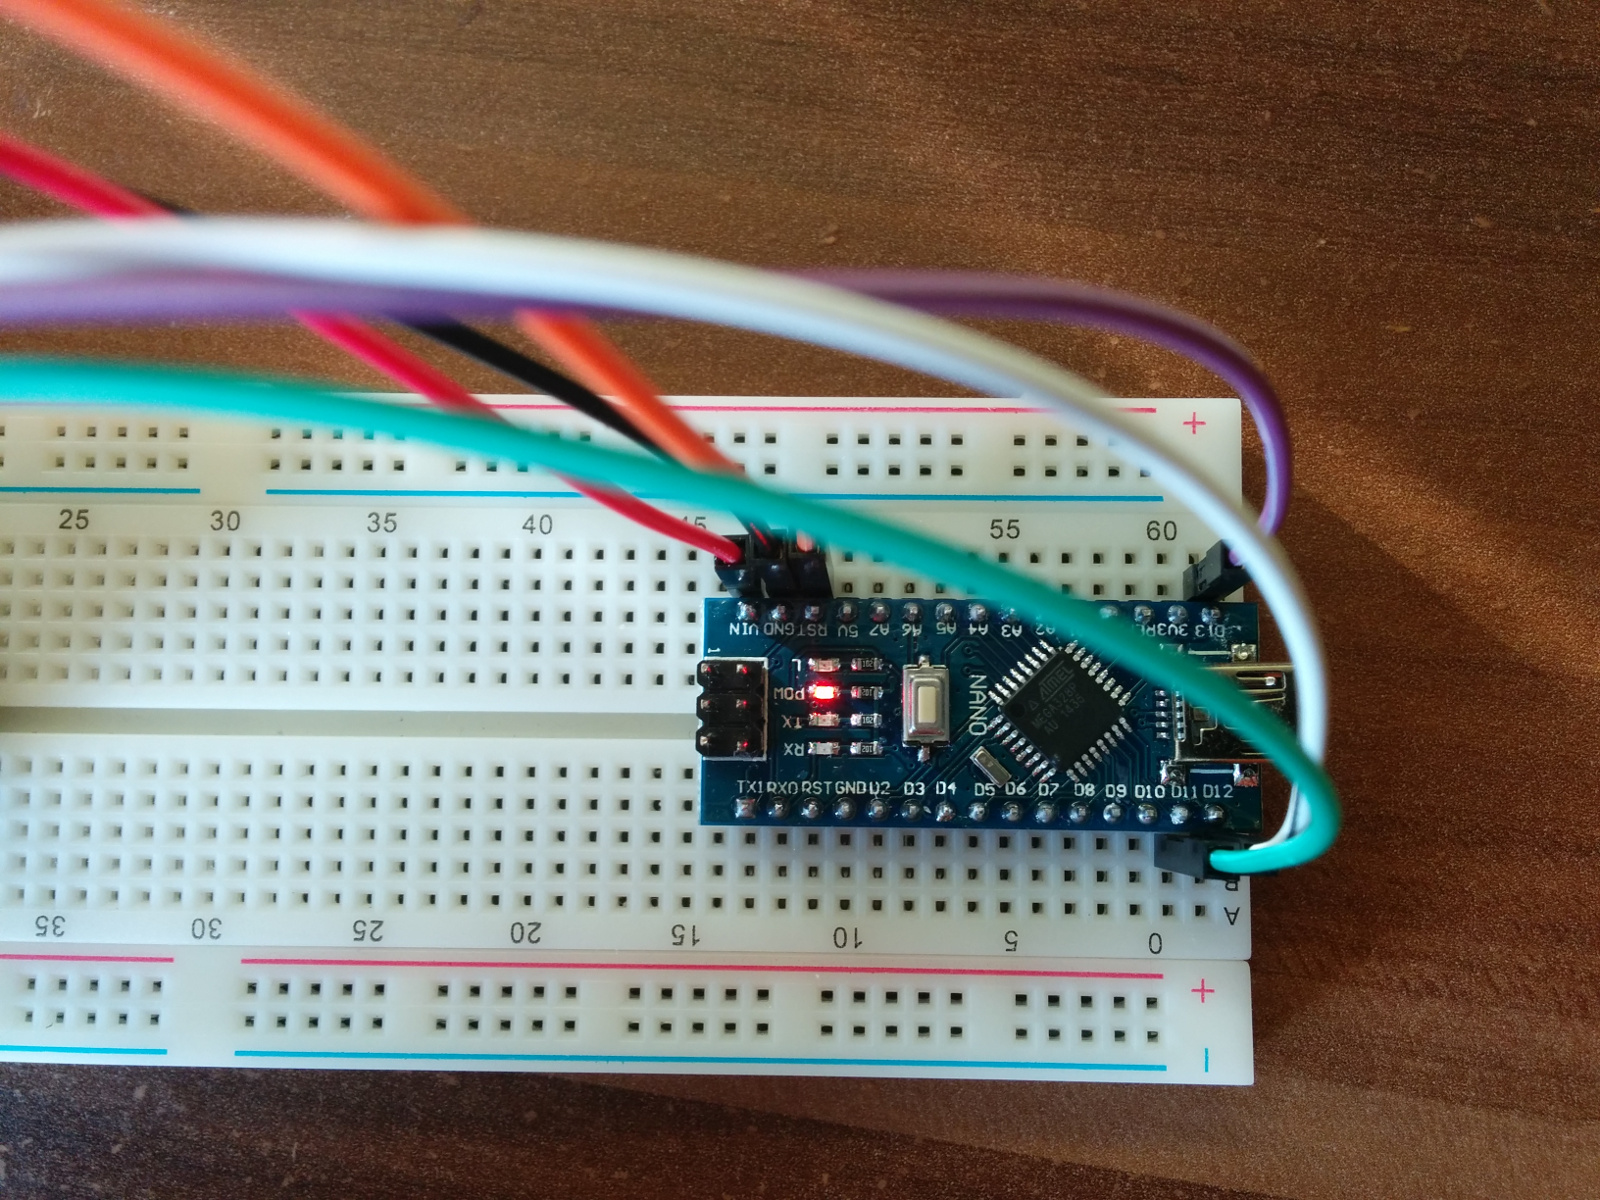
The ATmega328P chip can be programmed using the SPI protocol. The process requires 4 digital wires and Raspberry Pi with its GPIO pins can be easily used to do that. On Linux, you can interact with GPIO pins using a sysfs interface and avrdude (the application that can program the chip) can talk the SPI protocol over this interface. So it's just a matter of connecting the pieces together. Normally you would use the AVR ISP pin header on Arduino to do this, but I did not have the right connector for that, so I used regular pins and connect them on a breadboard.
You need to use specific pins on the Arduino, but you can use any of the available pins on the Raspberry Pi. I used these:
- Pin D11 (MOSI) on Arduino to pin 20 on RPi
- Pin D12 (MISO) on Arduino to pin 16 on RPi
- Pin D13 (SCK) on Arduino to pin 21 on RPi
- Pin RESET on Arduino to pin 12 on RPi
- GND on Arduino to GND on RPi
- 5V on Arduino to 3.3V on RPi
Arduino should normally be powered by 5V, but Raspberry Pi needs 3.3V on GPIO pins, so we will run the Arduino at lower voltage. It should be fine for the programming.
The result looked like this:

Now the software part. The avrdude package that comes with Raspbian is not compiled with linuxgpio support, so we need to build our own.
sudo apt-get install bison flex libusb-dev
cd /tmp
wget http://download.savannah.gnu.org/releases/avrdude/avrdude-6.1.tar.gz
tar xf avrdude-6.1.tar.gz
cd avrdude-6.1
./configure --prefix=/opt/avrdude --enable-linuxgpio
make
sudo make install
You need to edit avrdude.conf to let it know the pins used.
sudo vim /opt/avrdude/etc/avrdude.conf
Somewhere in the file find the commented out linuxgpio section and add this in there.
programmer
  id    = "linuxgpio";
  desc  = "Use the Linux sysfs interface to bitbang GPIO lines";
  type  = "linuxgpio";
  reset = 12;
  sck   = 21;
  mosi  = 20;
  miso  = 16;
;
If everything is connected and configured properly, you should be able to run this now and get into the avrdude console.
sudo /opt/avrdude/bin/avrdude -p atmega328p -c linuxgpio -v -t
Now we need to modify the Arduino IDE configuration to recognize the new programmer. I don't know if this can be done locally, so we will edit the system-wide configuration file.
sudo vim /usr/share/arduino/hardware/arduino/programmers.txt
Put this somewhere near the end of the file.
rpigpio.name=RPi GPIO
rpigpio.protocol=linuxgpio
We also need to tell the Arduino IDE to use our version of avrdude. Again, because I don't know of any better solution, we will overwrite the default symlinks that come with the package.
sudo ln -fs /opt/avrdude/bin/avrdude /usr/share/arduino/hardware/tools/avrdude
sudo ln -fs /opt/avrdude/etc/avrdude.conf /usr/share/arduino/hardware/tools/avrdude.conf
That was the last configuration step and now we can actually program the chip. Becuse you can't use the Linux GPIO sysft interface as a regular user, you need to start the Arduino IDE as root for this. Select your board type in "Tools -> Board", select the "RPi GPIO" option in "Tools -> Programmer" and then install the bootloader using "Tools -> Burn Bootloader". Once the bootloader is installed you can close the IDE, remove the pin connections, plug in USB cable and start the IDE as a regular user.
Hope that helps somebody.